If you take a digital photograph using a camera which has no infrared-blocking filter, infrared will pass through the colour-filters (the Beyer matrix) on the sensor and will register with the red, green and blue photo sites. With an infrared filter such as the common 720nm one, almost all the radiation reaching the sensor will be invisible to the naked eye. (Saying a filter has a wavelength of 720nm means that at 720mn the filter blocks 50% of the light with shorter wavelengths reduced more and longer ones by less.)
The three colour filters on the sensor will pass near infrared light but in differing amounts and that results in what seems to be a colour picture. I call this faux-colour to distinguish it from the false colour that infrared Ektachrome produced.
It will usually look something like this ...
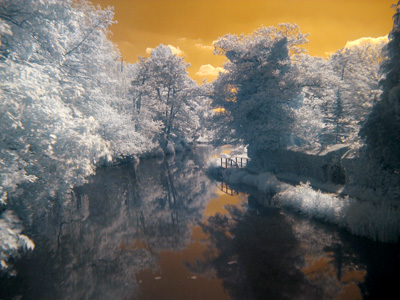
Here the colour balance has been adjusted slightly to make the foliage appear white/grey but even without this change the sky is a reddish-brown colour.
If you don't like this you can change it since there is no correct version of this colour arrangement, it is purely an artefact of your camera's Beyer filtering when confronted with near-infrared.
The usual technique is to use the colour mixer in Photoshop (or similar) to swap the red and blue channels which results in this ...
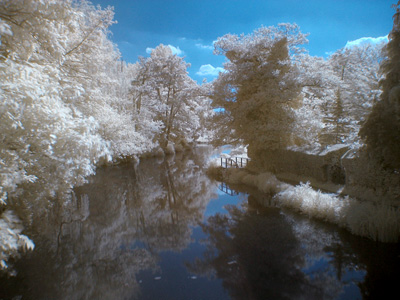
There is an alternative way, which is quicker and produces slightly different results. If you convert the image from RGB into LAB colour then you can invert (make negative) the A and B channels to change that reddish sky to a blueish one. Neither of the A or B channels has a red-blue axis. Red-green (A) and yellow-blue (B) are the axes of the components: colours are defined by their position along those two axes (and the L is the luminance or brightness).
Inverting the B channel changes the sky to a blue colour ...
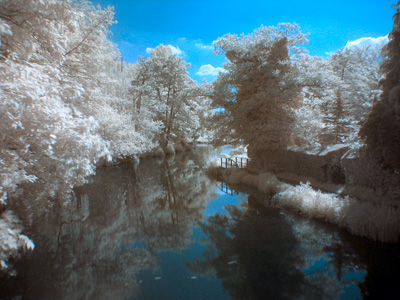
This is different to the channel swap result. Inverting the A channel has a much smaller effect on the image but you can do this as well as inverting B to get this result ...
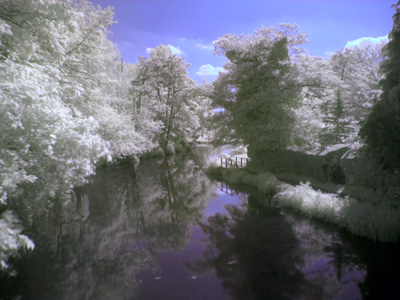
So now we have three ways to post-process the faux-colour images. My personal preference is for the one with both LAB colour components inverted, but your mileage may differ.
2010 marked the centenary of the first published infrared image. This is the Infrared 100 blog, which celebrates that centenary and discusses all aspects of infrared imaging: near and far.
Monday, 28 January 2019
Thursday, 10 January 2019
Trees and the Wood effect
The effect in infrared photographs where foliage appears bright or white is known as the Wood effect. This is named after Professor Robert Williams Wood rather than wood as in trees. What happens is that light around in the high 600 nanometres wavelength is not absorbed or reflected by chlorophyl. So the light bounces around inside plant cells and either passes through or comes out, including towards the viewer. This happens with snow, which is why infrared and snow scenes are sometimes mistaken for each other.
The amount of Wood effect isn't related to the colour of the leaves, as these two photographs show. First a pair of trees, of definitely different colour ...
When you look at the same trees through a 720 nm filter you can see that they look basically the same ...
Incidentally, the Wood effect happens in very deep red, rather than in true near-infrared. You can prove this if you have a 720nm filter. Go outside on a sunny day and look through the filter at some foliage. It will be very faint, but you will see the glow.